Mount power supply (ELG+HLG 150/240) and adapter plate
Assembly instruction: Mount power supply and adapter plate
Overview
working time
5 min.
difficulty
beginner
Steps
4
1 Prepare material
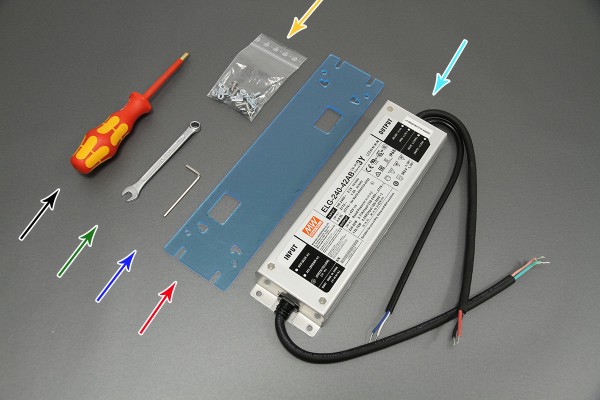
Phillips screwdriver (not included in the delivery)
Open-end wrench size 7 (not included in the delivery)
Hex screwdriver 2,5mm
Adapter plate
Power supply
Mounting set for the adapter plate
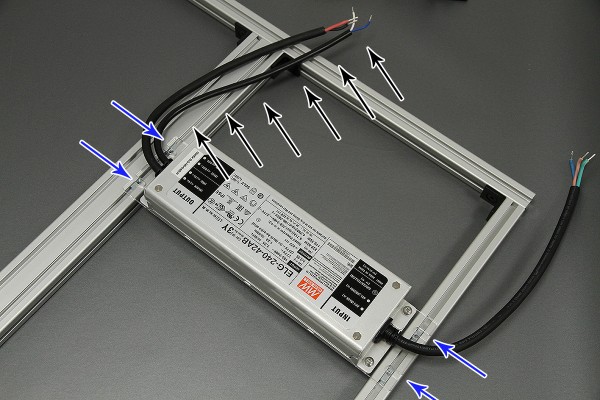
2 Mount power supply on adapter plate
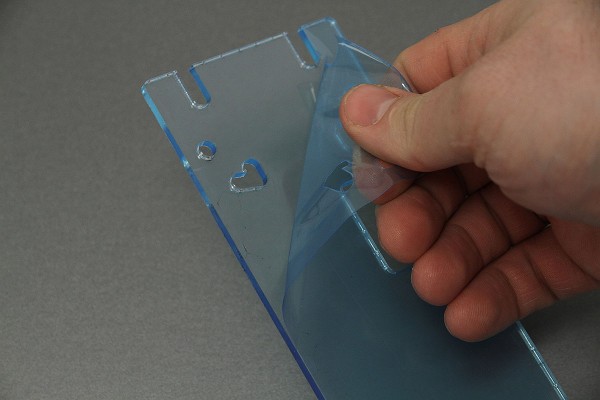
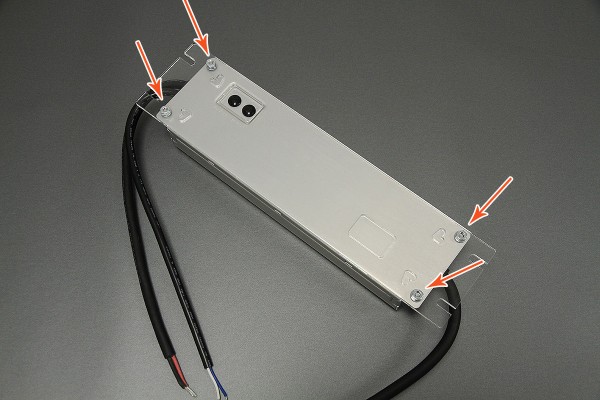

Pull off the protective sheet.
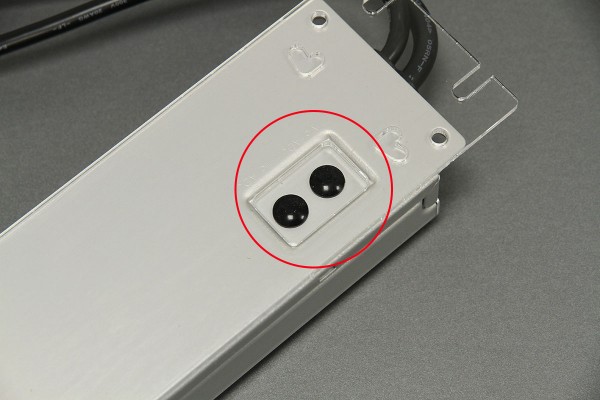
Please take care of the potentiometers of the power supply and the open window of the adpater plate.
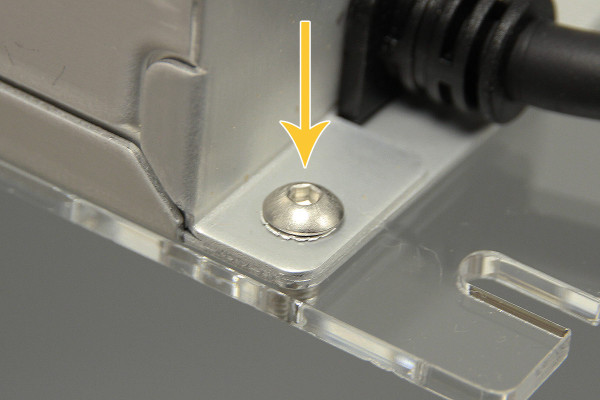
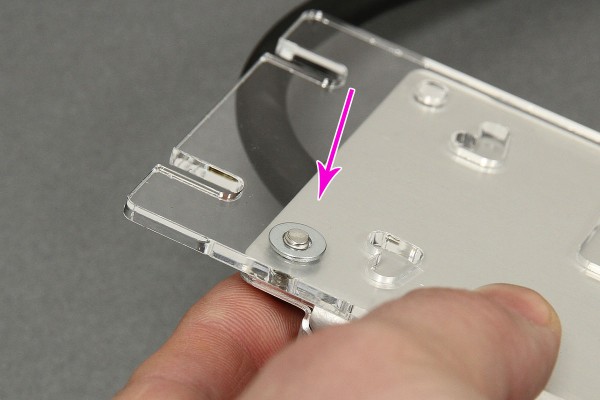
Insert the M40x10 screw into one of the mounting holes.
Turn the adapter plate upside down and put the flat washer onto the screw.
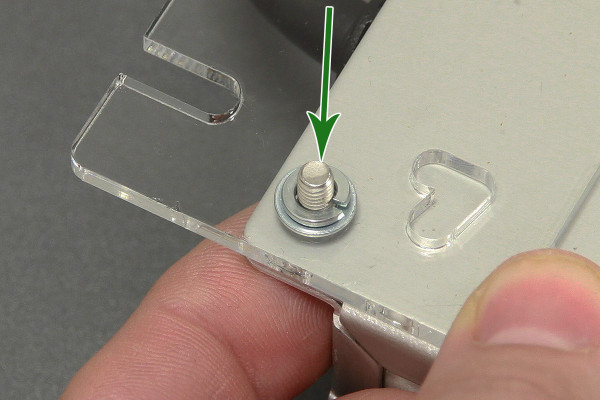
Now set the spring washer on the M4x10 screw.
Now tighten the M4 nut on the screw by hand.
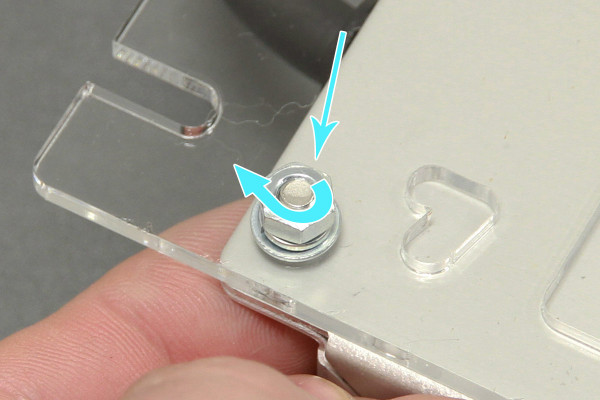
Mount the remaining three screws like shown on the last four work steps.
After mounting all screws, tighten them now with the hex screwdriver and the open-end wrench. Please be careful, don't over tighten the screws. The acrylic glass can break!
3 Insert slot nuts
Place the adapter plate on the frame for positioning the slot nuts. You can mark the places with a pencill.
Please take care of the dimmer cable! The end of the cable must reach the border of the frame!
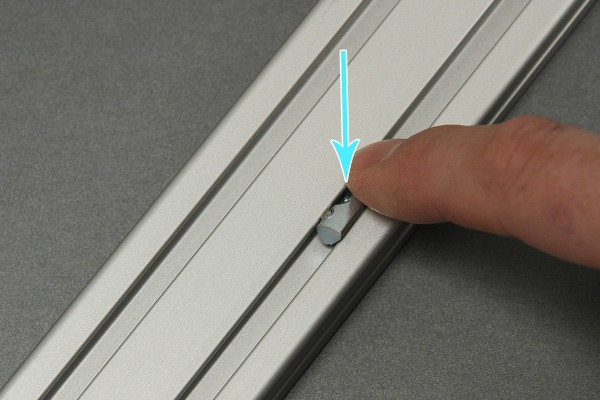
In the following steps, we explain how to insert the slot nuts from the top of the profile. Place the slot nuts to the before marked positions.
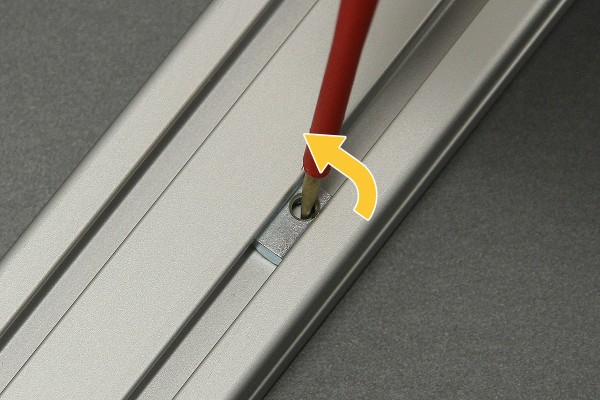
Press the slot nut sideward into the profile.
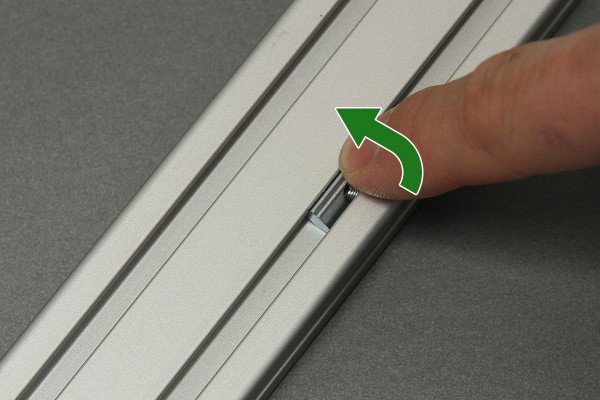
After inserting, please tilt the nut slot into the right position like shown on the photo.
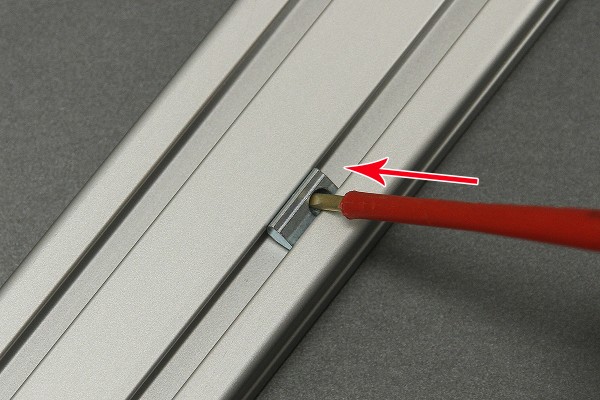
Insert a small screw driver into the slot nut. Please be carefully, don't damage the thread!
Now turn the screw driver carefully so that the slot nut turn upwards inside the profile.
4 Tighten adapter plate with power supply
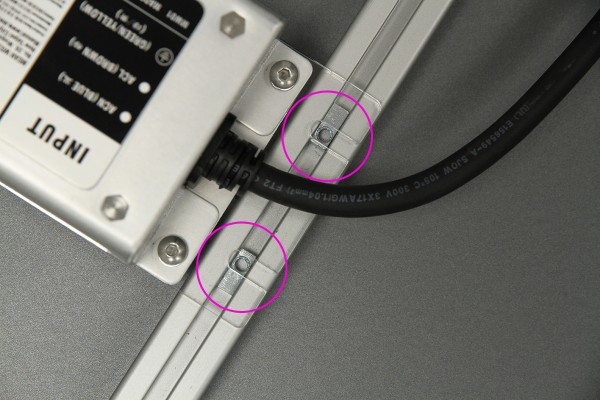
Place the adapter plate on the frame again. The threads of the nuts must be placed under the notch of the adapter plate.
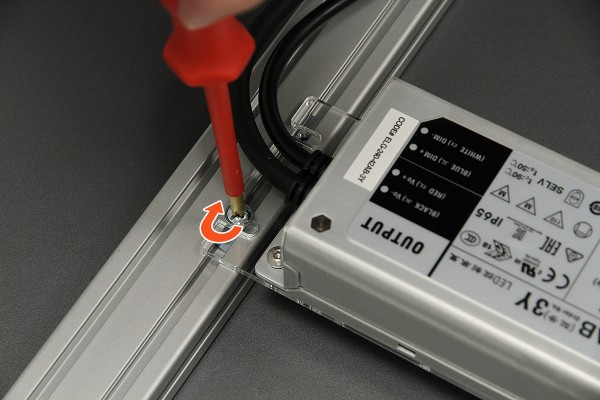
Now attach the M4 Screws. Please be careful, don't over tighten the screws. The acrylic glass can break!
© LED-TECH.DE - Disclaimer: Mounting and operating only by qualified (electric-)staff. We do not assume any liability.