Mount brackets
Assembly instruction: Mounting instruction of a 54x58cm DIY-240W-KIT
Overview Page forward
working time
30 min.
difficulty
beginner
Steps
3
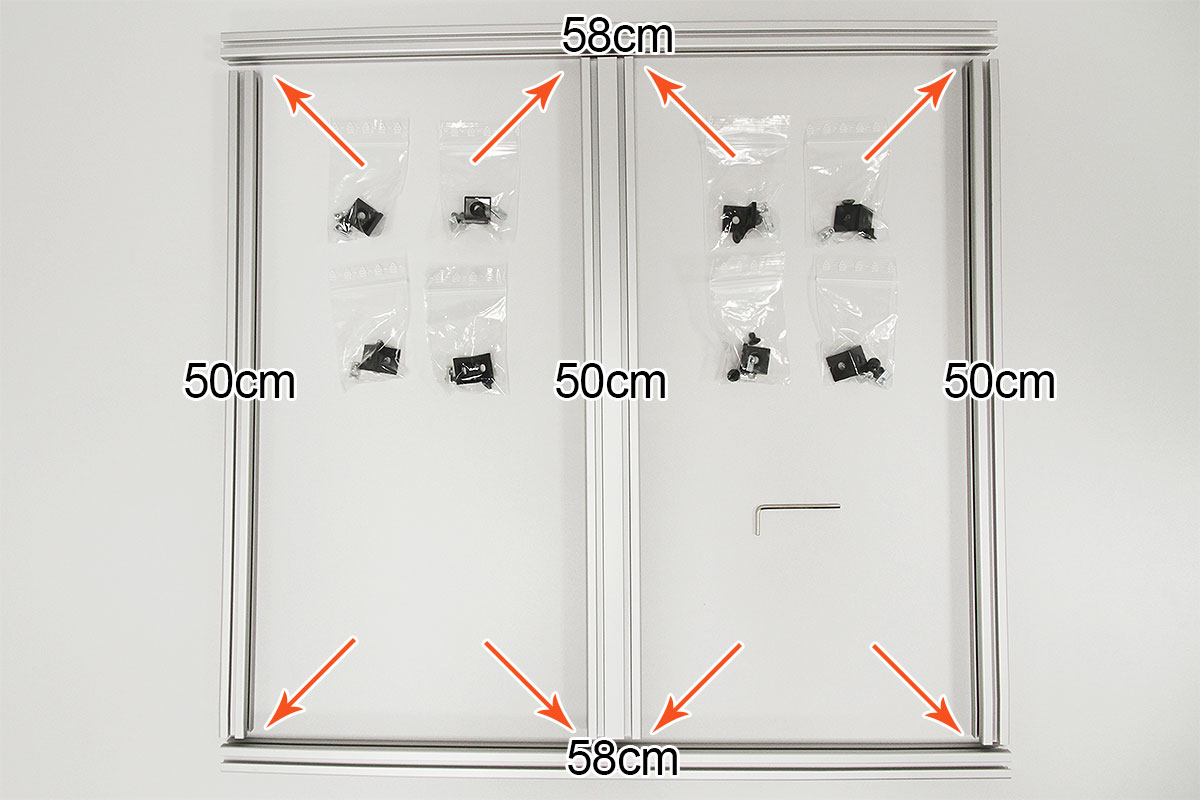
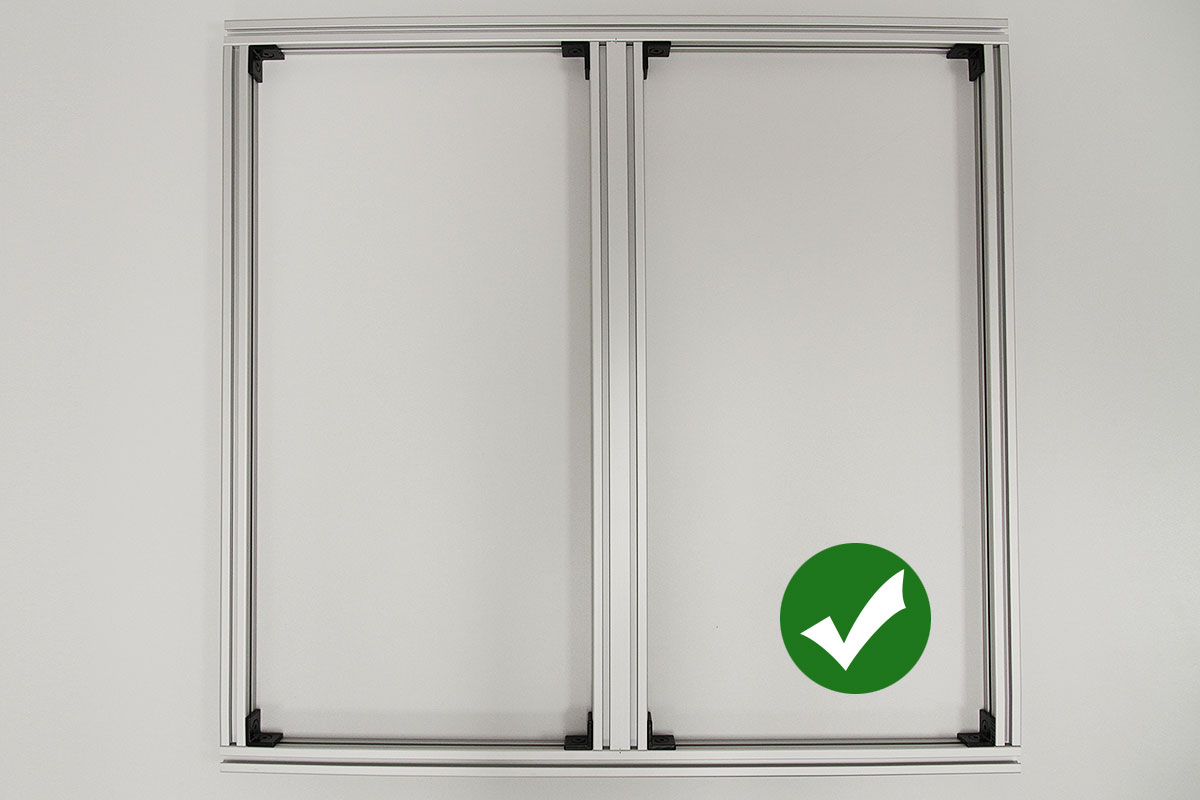
For Mounting the frame you will need: 8 x Bracket-Set, 2 x 58cm profile, 2 x 50cm profile, 1 x 50cm double-profile and the hexagon socket wrench. The Bracket-Sets will be mounted on each corners where the orange arrows points to.
1 Preparing the parts each bracket
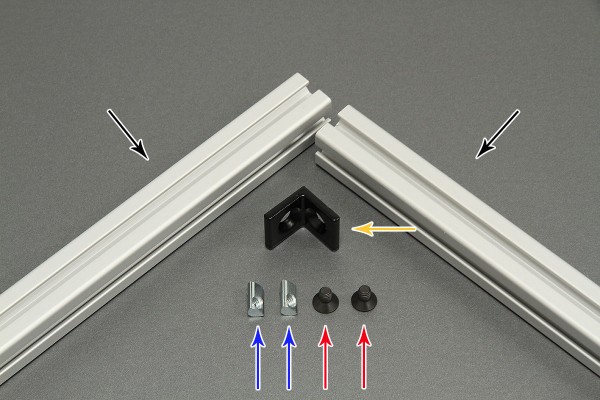
System profile
1 x 90° Braket
2 x Countersunk screw M5x8
2 x Slot nut M5
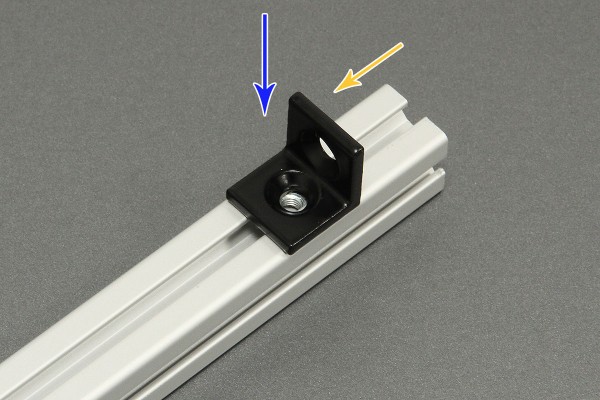
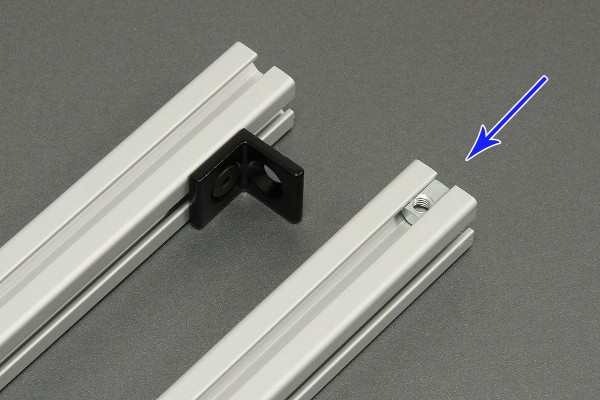
2 Place slot nut and mount the bracket
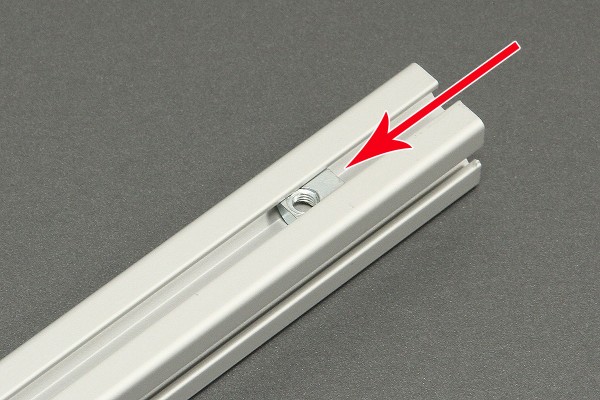

Insert first M5 slut nut approximately 3cm into the notch of the profile.
Place the bracket on the center of the slot nut.
The bracket should have a distance of 2cm to the end of the profile.
Screw the M5 screw into the slot nut. Please don't tighten the screw yet.
3 Mount second profile
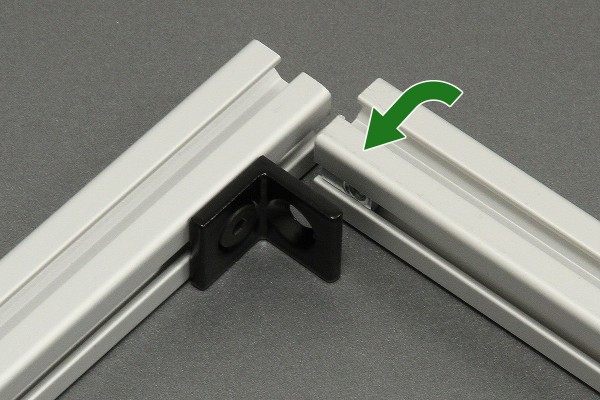
Take care of a flat and plain surface.
Insert the second slot nut into the profile, like shown on the photo.
Turn the profil 90° and place it on the bracket.
Screw the second screw into the slot nut. Take care of concision and right angle. Now tighten the screws.
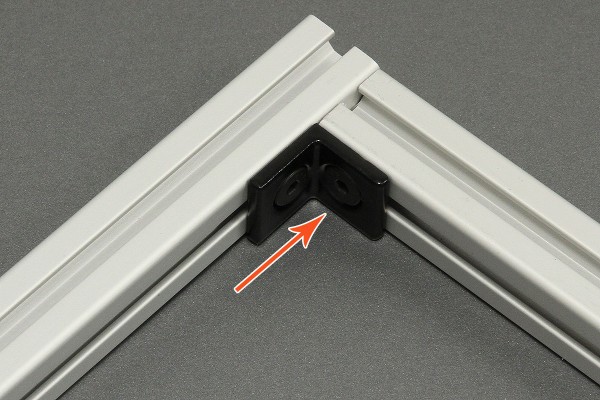
Repeat these steps, till the frame is ready mounted like on the shown picture.
© LED-TECH.DE - Disclaimer: Mounting and operating only by qualified (electric-)staff. We do not assume any liability.